
Horse Barn Trench Drain
In this case, a drain was previously installed and deemed later to be inadequate for several reasons. The owners decided to replace the old drain with a product called Econodrain #4. This trench drain system is formed and utilizes a disposable foam mold to shape the channel in concrete. Using a trench forming system is an easy way to incorporate a functional drainage system into a variety of applications. In this horse barn, they were seeing a high flow and needed a drain that could handle the volume.
Phase 1 – Initial Site Visit
The barn is situated slightly downhill from the rocky crest of a horse pen. When it rained, water naturally followed to the north door of the barn and continued downhill through the south door. In an attempt to stop the flow, the hired contractor installed a trench drain at the northern side and a catch basin in the center of the barn. A pipe was then connected to each and then to a lower drainage outlet. The floor was finished with asphalt which covered the gravel layer containing the plumbing.
Three key problems existed when we came onto the scene.
Drain Selection :
-
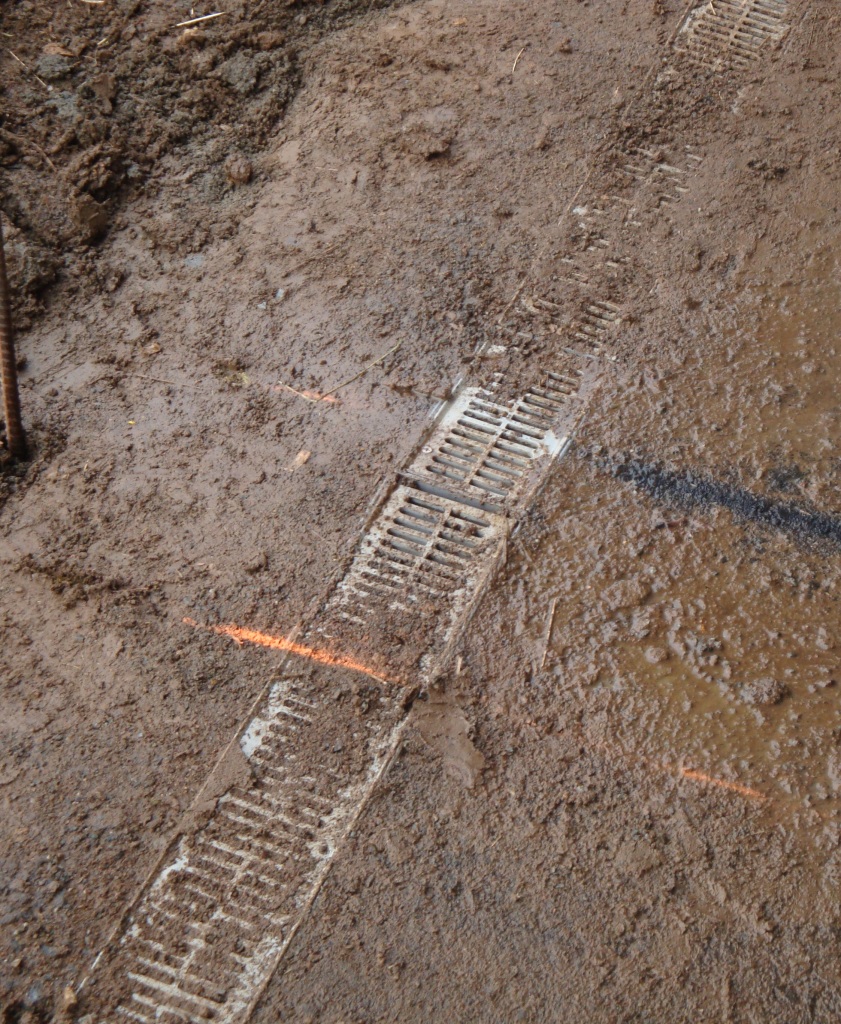
- The original contractor decided to take the easy route; purchasing a small neutral plastic drainage system from a big box store. Unfortunately, this type trench drain is meant for pool and sidewalk applications, not farm and barn. Drain selection is incredibly important when it comes to keeping livestock safe. At 3-4″ wide this drain can only effectively handle a low gallon per minute(GPM). The barn was seeing a higher flow rate due to the amount of run-off water coming down the hill. In addition, the water was heavy with sediment and the openings on the grates were becoming clogged, making drainage almost nonexistent.
Drainage Pipe :
-
- A second problem was the drainage pipe used to take the water from the trench. A 4″ corrugated pipe was used instead of a 4″ sewer and drain pipe (S&D pipe). Unlike an accordion flex pipe, S&D pipe is smooth lined and more rigid. In the process of backfilling and compacting the gravel in the previous installation, we found that this outlet pipe was smashed, which constricted the flow, making water drainage difficult.
Drainage Outlet :
-
- Lastly, and even more ridiculous, was the drainage outlet to this system. In the process of digging the trench for the drainage pipe, the contractor found an old French drain and decided that was a suitable place to connect the outlet. In effect, the drainage water was put into a small perforated pipe that had no outlet.
So, in summary, a system that was designed to handle 10-20 gallons/minute was subjected to a flow of 60-70 gallons/minute. Even so, it couldn’t handle the limited flow due to the crushed pipe and having no actual outlet. No wonder the barn was flooding!!
Choosing a Contractor
Having an appropriate contractor for the right application is extremely important. For example, when you ask a paving contractor for details on a plumbing project or estimate drainage requirements for a landscape issue, you may be asking someone who isn’t knowledgeable about drainage. For these applications, you must speak to someone that knows about drainage and can help you design a water control system suitable for your situational needs.
Phase 2 – Installation
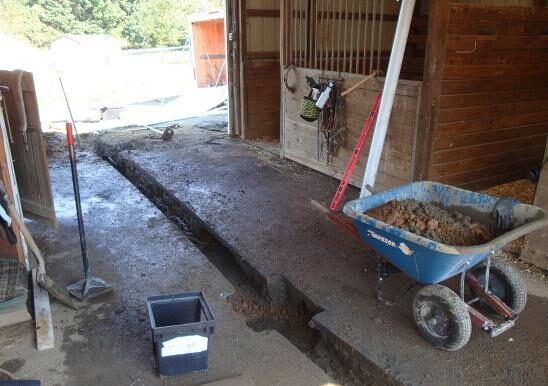
There are several steps to take when installing drainage. In this case we had to remove the old drain, cut the asphalt, excavate the soil, and remove the old ineffective pipe. Then the new drain and piping could be installed, backfilled with gravel, and a final topping of concrete poured.
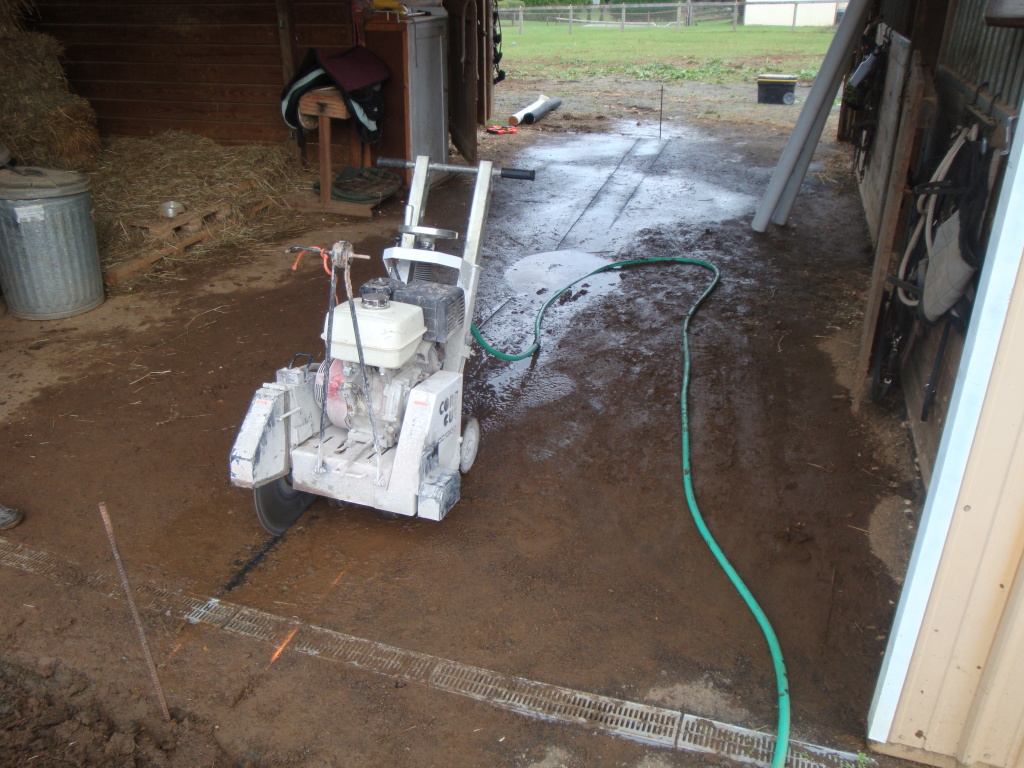
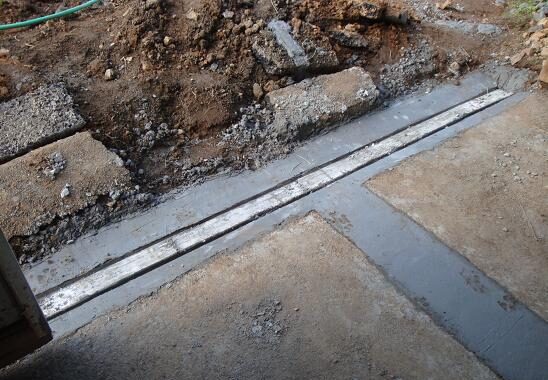
First, we laid parallel chalk lines 12-inches apart in the center of the barn and used a concrete saw to cut the asphalt at the designated markers. The asphalt was only 3 inches deep and easily cut and removed. Similarly, the gravel beneath was also removed and stored for later reuse.
A new catch basin was also installed in the square cut out. A best practice is to use 4-inches of concrete perimeter around any catch basin. For more information on catch basin installation, view one of the previous posts that have been written on this topic.
We got the job done using good old fashioned elbow grease and standard concrete tools for the installation.
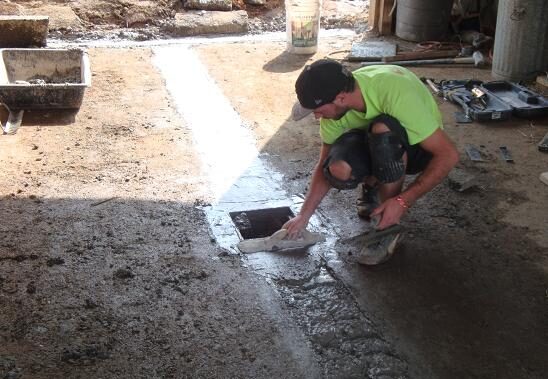
Phase 3 – Finishing Touches
The aftermath of a concrete pour is a sight to behold. When we arrived the following day for the big clean-up, there were several places where the horse and dog had stepped in the fresh concrete, leaving their mark of approval on the project. It gave the final appearance a unique and personal charm for the owners.
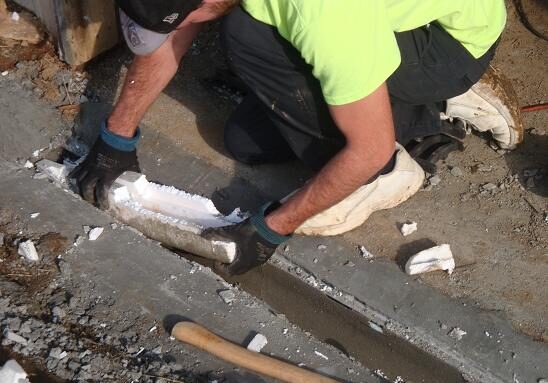
After grinding off the 3/16″ spreader bars, the form was removed from the trench. Because a mold release was used on the form surface prior to pouring concrete, it was easy to remove. At this point, we patched any blemishes within the trench with mortar. Any dried concrete that the steel rails were exposed to was then scraped and wire brushed to remove The channel was swept clean and made to look presentable.
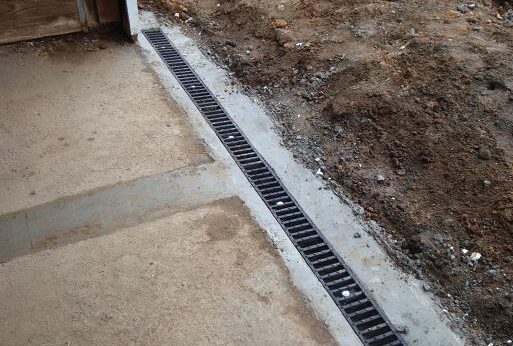
Cast iron grates were finally put in place and fixed with locking devices to maintain their load rating. By using grates made of cast iron, there would be no problem with grates breaking under the weight of a horse or tractor. These grates also had a large open area to allow water to quickly descend into the drain body.
We still had some trenching to perform and some pipe to lay downhill from the barn. Recycling some of the asphalt chunks excavated the day before we placed them into the backfill around the drainage outlet. Instead of bringing the pieces to a landfill, we layered the asphalt over the S&D piping to protect it from being crushed by tractors and then covered the area with dirt. The owners finished by surrounding outlet pipe with additional stones in an effort to make it more visible for vehicles passing through the area.
With the construction area cleaned, water was poured into the drain to verify that everything was pitched correctly and flowing uninhibited. The owners still had plans to level out the ground in front of the barn, but they finally had a drain that worked.

The experts at TDS can help you find the right drains to fit your plan and budget. Contact us for a free quote or for further information on drainage solutions visit TrenchDrain.com or DrainageKits.com.
Phone: 610-882-3630
Email: [email protected]